

Last year, we introduced Geovonic Connect as an integration service linking your ArcGIS web mapping applications to with data coming third-party business systems.
Using the Geovonic Connect widget, you can build ArcGIS web apps so that users can view data from third-party applications and databases retrieved in real-time based on feature selections on a web map, as well as launch your business systems and use document templates combining data from multiple systems.
A new Geovonic Connect plugin was recently released for fetching customer and account information straight out of your Salesforce CRM system.
We use Salesforce ourselves and so we’ve setup Geovonic Connect to add sales information to our internal local government customer map. In this blog post I wanted to quickly walk through how to set this up using ArcGIS Experience Builder, Geovonic Connect and Salesforce SOQL.
The existing map
We have an ArcGIS Online web map showing each of the local government areas with the status of the account. It provides a great way of seeing which councils we are working with across the country. The council data is stored as an ArcGIS feature layer, with attributes containing basic information such as the name of the council and a polygon representing the council area.
We want to be able to also see information about the products each customer has access to and who the key contacts are at each council. The traditional way to do this (before Geovonic Connect!) was to run a nightly ETL process to pull the data out of Salesforce and append it to the ArcGIS feature layer data. But we no longer need to do this as we can use the Geovonic Connect widget to pull the data straight from Salesforce into the map.
The good news for me when setting this up is that the NAME attribute on the LGAs in the ArcGIS feature layer is the same as the account name in Salesforce. That makes it nice and easy to relate the customer data with the map features!
Building an SOQL statement
Salesforce uses a query language called SOQL (Salesforce Object Query Language) that is very similar to the SQL we’re all familiar with for searching across databases. They also provide a handy query builder workbench that allows you to pick the objects and fields that you want to return.
You can access the query builder here. You’ll need to be logged in to your Salesforce account to use it.
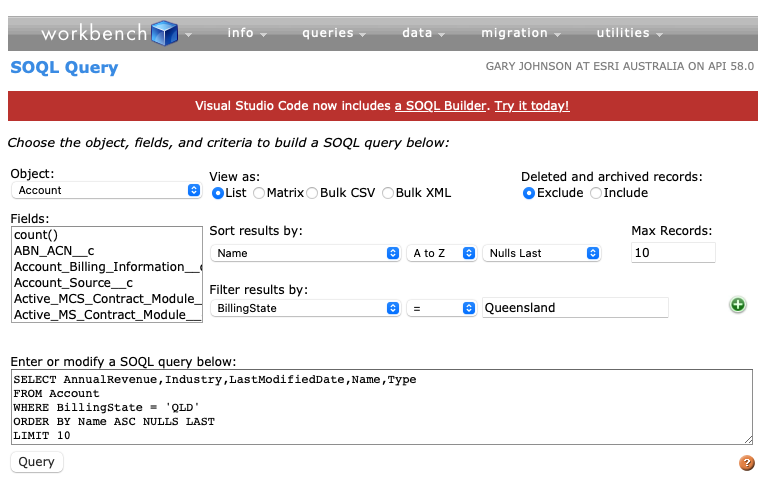
For my map I’m going to use a couple of different queries to retrieve the information I want.
The first one retrieves the 10 most recently updated contacts for the account.
SELECT Email, Name, Phone, Title
FROM Contact
WHERE Account.Name = '{{NAME}}'
ORDER BY LastModifiedDate DESC
The second one retrieves the list of products that are linked to the account.
SELECT CloseDate, Name
FROM Opportunity
WHERE Account.Name = '{{NAME}}' AND IsWon = True
ORDER BY CloseDate DESC
You’ll notice that for each query I have used the {{NAME}} syntax in place of the account name. This is the syntax that Geovonic Connect uses to substitute an attribute from the map into the query. So these queries will be called for each of the selected map features, passing in the name attribute in place of {{NAME}}.
Configuring Geovonic Connect
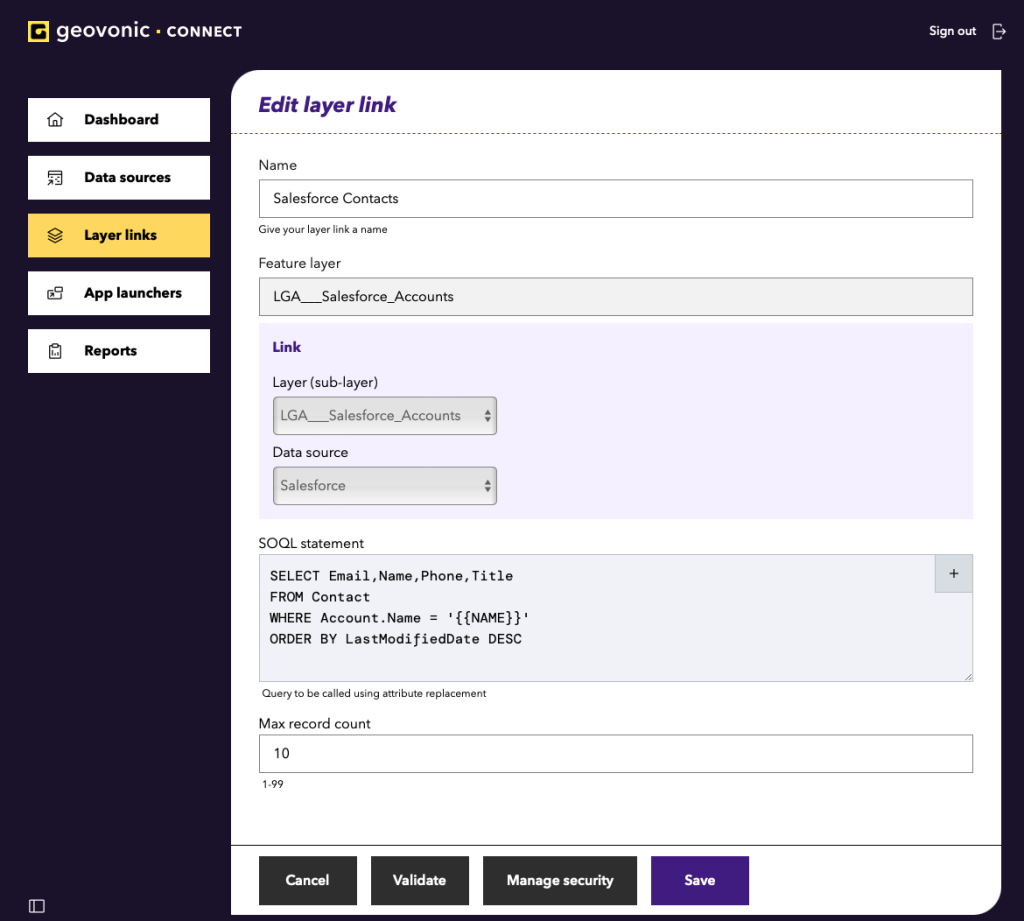
Now that I’ve built and tested my queries in the workbench, I am ready to configure the relationship between my map layer and the Salesforce contacts and products in Geovonic Connect.
Note: The Salesforce data source is a premium Geovonic Connect plugin. It will only be available in your dashboard if your account has access to it. Contact the Geovonic support team if you want to learn more about getting the Salesforce data source.
When adding a Salesforce data source in Geovonic Connect, you need to include a security token. I found this helpful guide steps through how to get a security token.
I added two layer links in the Geovonic Connect dashboard. One for contacts and one for products. The screenshot here shows the layer link configured between by LGA map layer and the Salesforce data source, using the query I built earlier.
Adding Geovonic Connect to the map
Now that I’ve defined my layer links, I simply add the Geovonic Connect widget to my mapping app and I can view data from Salesforce.
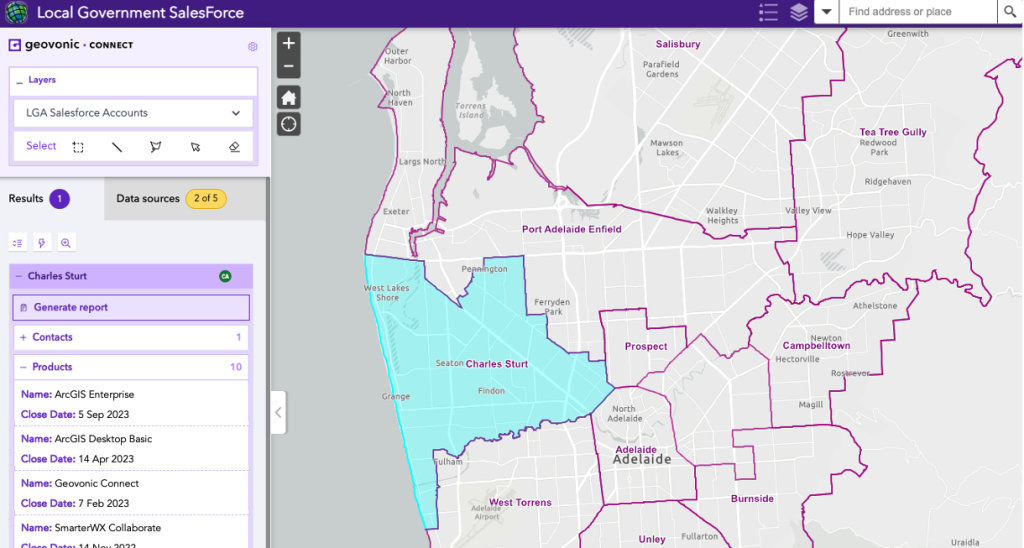
As the user selects each local government area on the map, the SOQL queries are automatically triggered and the product and contact information is shown in the widget.
Note: I’ve faked up the data shown on the widget here for the purposes of this post!
Learn more
To find out more about how to use Geovonic Connect, check out the online help at www.geovonic.com/help.