
Imagine you had a large sales team who regularly visited potential clients, wrote down all of the details of who they visited and then once every week or two came back to the office, hunted around for their notes and then passed them over to an administrator who entered the details into a CRM application. Maybe your team is not in sales. They might be emergency rescue workers plotting where they have been when they are looking for a lost person, or they may be utilities contractors capturing conditional assessment data.
Wouldn’t it be nice if the data was captured out in the field, located spatially at the time and instantly shared with your colleagues? The good news is this technology is already available and Esri has a smartphone app for this. Here is one way you can make use of ArcGIS Online and ArcGIS for mobile:
- Create a point feature class in ArcCatalog and add all the fields you want to be captured.
- Open and save an empty MXD and add the new feature class.
- Publish the MXD with the empty feature class as a map service, enabling Feature Access.
- Test that the REST endpoint is accessible on the Internet, e.g. http://myserver/arcgis/rest/services/myfolder/mymapservice
- Log into ArcGIS Online (http://www.arcgis.com) – you can register for a 30 day trial if you don’t have an organisational account.
- On the ArcGIS.com site, go to My Content, Create Service and enter the external URL for your map service. This URL should look like http://myserver/arcgis/rest/services/myfolder/mymapservice/FeatureServer
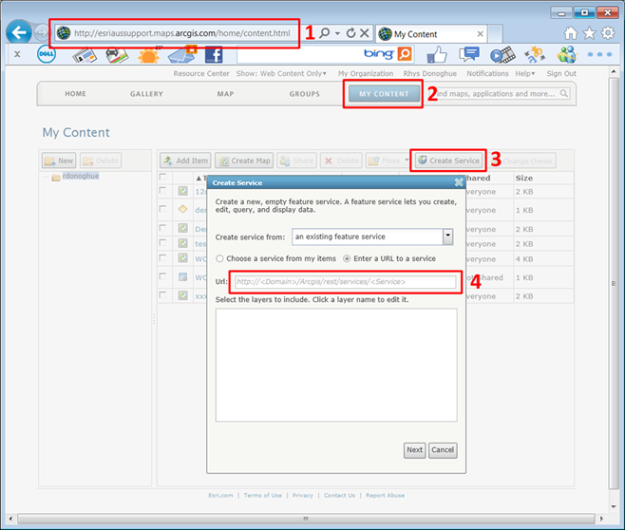
- Follow through with the wizard. Once the service is created, it will show up like the demo service below. Make sure it has Feature Service in the Type Field. Click Share and choose whether to share it with a group or everyone. Note that when points are added, they will be saved to ArcGIS Online, not your original server location – this is because we chose the Create Service option.

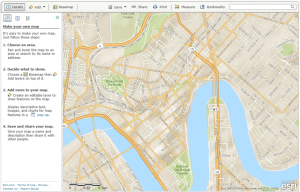
- Click the Map button so you can start creating a new map:
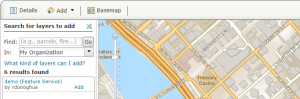
- Click the Add dropdown and choose “Search for Layers” and change the “In” dropdown to “My Content”. You should see your new feature service there. Click Add and close the Search for Layers panel.
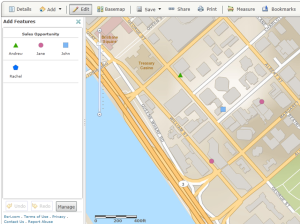
- If you have done everything right, then you will be able to edit your layer. Note that you won’t see any points until you create them. Also note that I have created the salesperson as a subtype on the feature class below. While I was creating the subtype, I also turned on Editor tracking in the feature class properties.
- You should now be able to save and share your map using the menu buttons.
- To finish off get the free app from http://www.esri.com/software/arcgis/smartphones. From the app, you can go to Find Maps \ My Maps and choose your map. If you can’t see it in the list, go back and check that it is shared. Once you can see your map on your phone, you should be able to start adding and editing points. You can also have your colleagues adding points at the same time you are adding points.


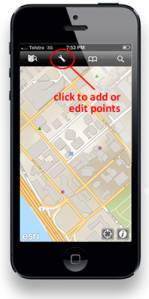
Once you have the map loaded in your smartphone, you can add or edit points by clicking on the tools button. Your colleagues can access the same map and add/collect points at the same time you are capturing points. Note that the same points are shown in ArcGIS Online that are on the smartphone. After the points are added using your smartphone, the points in ArcGIS Online will update as soon as you pan or refresh your screen.

Now, how to sync those smartphone edits back down to the local feature class created in step #1? For local analysis and map creation. Also, can you sync down any images that were attached to the points?